
UFC 5 stamina: the two-bar system
Stamina is the only resource in UFC 5 that both fighters spend and neither can buy back. It has two bars, it is drained by everything you do, and the way it interacts with damage is the single biggest difference between a player who wins rounds and a player who wins fights.
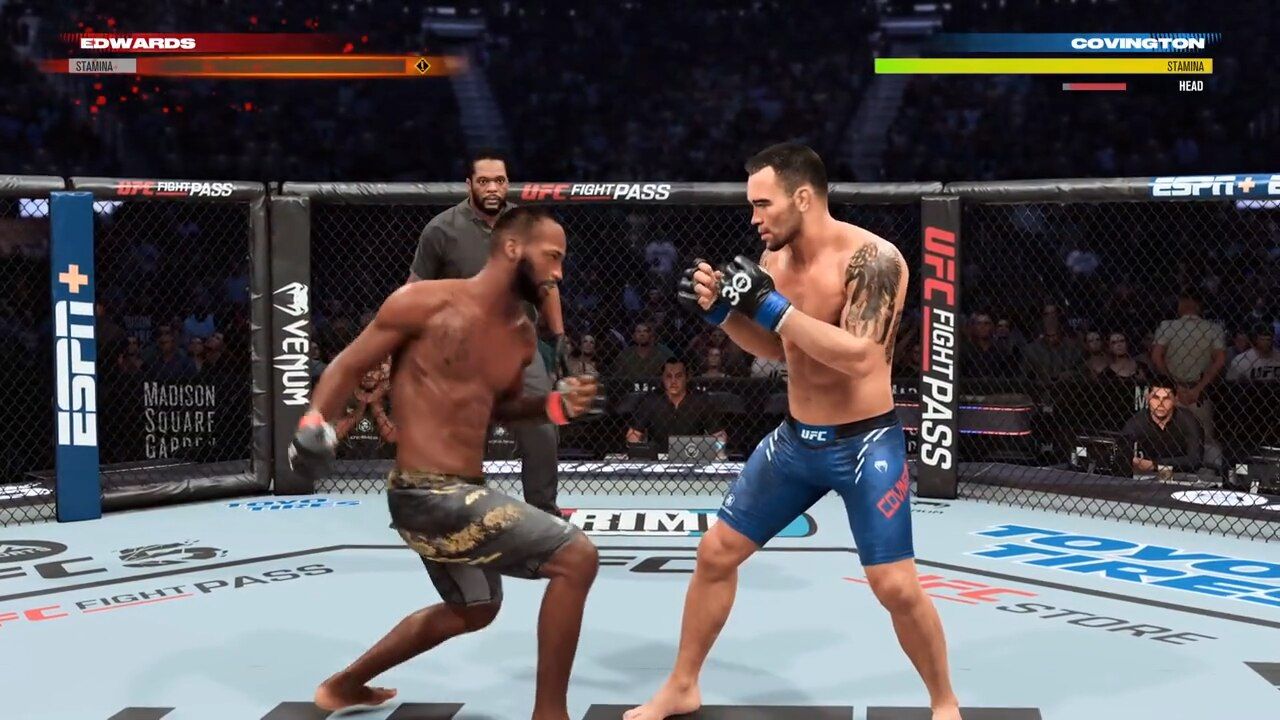
Two bars, not one
Your Current Stamina is the bar you watch. Your Maximum Stamina is the light grey bar behind it, and it is the one that decides how the rest of the fight goes.
Every action drains Current Stamina. Current Stamina only recovers up to the Maximum Stamina ceiling, so once the ceiling drops, your best rounds are behind you. Keeping Maximum Stamina from shrinking is the actual skill; managing the visible bar is just bookkeeping.
Why the same strike costs different amounts
The lower your Current Stamina when you take an action, the more Maximum Stamina that action costs. Attacks performed at low Current Stamina also deal less damage.
There is one generous exception: a combination maintains the permanent cost and the damage of the stamina value at the moment the combination started. Throwing a three-strike combo starting from full stamina costs what a full-stamina combo costs, even if the third strike lands when the bar is half empty. This is why structured combinations are efficient and random poking is not.
The practical rule that follows: recover to full between combinations, not between individual strikes.
What drains stamina, in order of how much it hurts
| Action | What it costs | Source |
|---|---|---|
| Missing a strike entirely | Direct stamina drain plus no damage | Official tips: missing strikes |
| Throwing a slow heavy strike (overhand, roundhouse) | High stamina cost and high vulnerability | Official tips: punches and kicks |
| Blocking repeated strikes | Block damage accumulates, guard weakens | Official tips: block damage |
| Being held in a deep choke | Maximum Stamina loss | Official tips: damage icons |
| Struggling in a submission | Drains both fighters | Official tips: submission struggle |
| Moving with no opponent nearby | Recovers stamina | Official tips: regaining stamina during gameplay |
| Standing still, inactive | Recovers the most | Official tips: regaining stamina during gameplay |
| Between rounds | Recovers some Maximum Stamina, scaled by Cardio | Official tips: regaining stamina between rounds |
How recovery actually works
Fighters regain stamina when they are inactive: standing still, or with distance between them and the opponent. That single sentence explains a lot of otherwise confusing fights. A player who backs off and resets is not stalling — they are buying back the resource that decides the next exchange.
Between rounds, fighters regain some Maximum Stamina depending on their Cardio attribute. Cardio is therefore a stat that pays out five times in a five-round fight, and almost never in a one-round Fight Now match.
The stamina-damage link
Low stamina does not just make you slower; it makes your strikes weaker. Attacks performed at low Current Stamina deal less damage, so a tired fighter loses both the exchange they are in and the next one.
Body damage compounds this. Body strikes drain body health and stamina, and a fighter with a drained body bar cannot recover stamina at the same rate. That is why body work is the standard opener against a pressure fighter: it does not need to knock them out, it just needs to make every one of their actions more expensive.
Blocking is a stamina decision too
Block Damage accumulates the more strikes you block in a row, and the rate is controlled by the Blocking attribute. A player who blocks everything is spending a resource, not avoiding the exchange.
The correct response when block damage starts to climb is to create distance or use head movement — both of which also create counter opportunities. Holding block through a combination is how a fresh fighter becomes a tired one without being hit clean.
The five habits that fix most stamina problems
- Stop throwing from out of range. A whiff is the worst trade in the game: full cost, zero damage.
- Throw in combinations, then reset. The combo keeps its starting cost; single strikes at half stamina do not.
- Do not throw at the end of a combination. The fourth and fifth strike of an improvised combo are the expensive ones.
- Use the space. If the opponent backs off, let them. Walking forward at low stamina is how you get countered.
- Spend stamina to take stamina. Body strikes and ground control both drain the opponent; that is the only way to make the fight cheaper for you and more expensive for them.
One number worth knowing
Trophy guides for the game recommend a simple rule: do not attack when your stamina bar is below half. It is not an official EA figure, and it is not a hard rule — but it is a useful calibration for how expensive low-stamina actions are. If you find yourself regularly throwing below half a bar, that is the habit to break first.
Reading the bar mid-fight
Two glances are enough once you know what to look for. The white segment is what you can spend right now; the grey tail behind it is what you will never get back this round. When the grey tail is longer than the white bar, every exchange from that point costs you more than it costs the opponent, and the correct play is to disengage until the white bar refills.
Next: Damage system · Tips and tricks · Ground offense